Tutorials: Standard Setup of ZotEZ2 for Zotero direct syncing and/or WebDAV PDF storage.
This tutorial describes the two simplest ways to configure ZotEZ2 for your first sync with Zotero.
Basically, we'll cover here the options of ZotEZ2 that correspond to the Sync's Tab in Zotero's desktop app's settings (see Fig. 1).
Step 1. Connection to your Zotero account ( )
)
If your library is synchronized with the Zotero servers, as illustrated by the image below, then you don't have to care about the location of the zotero.sqlite file.
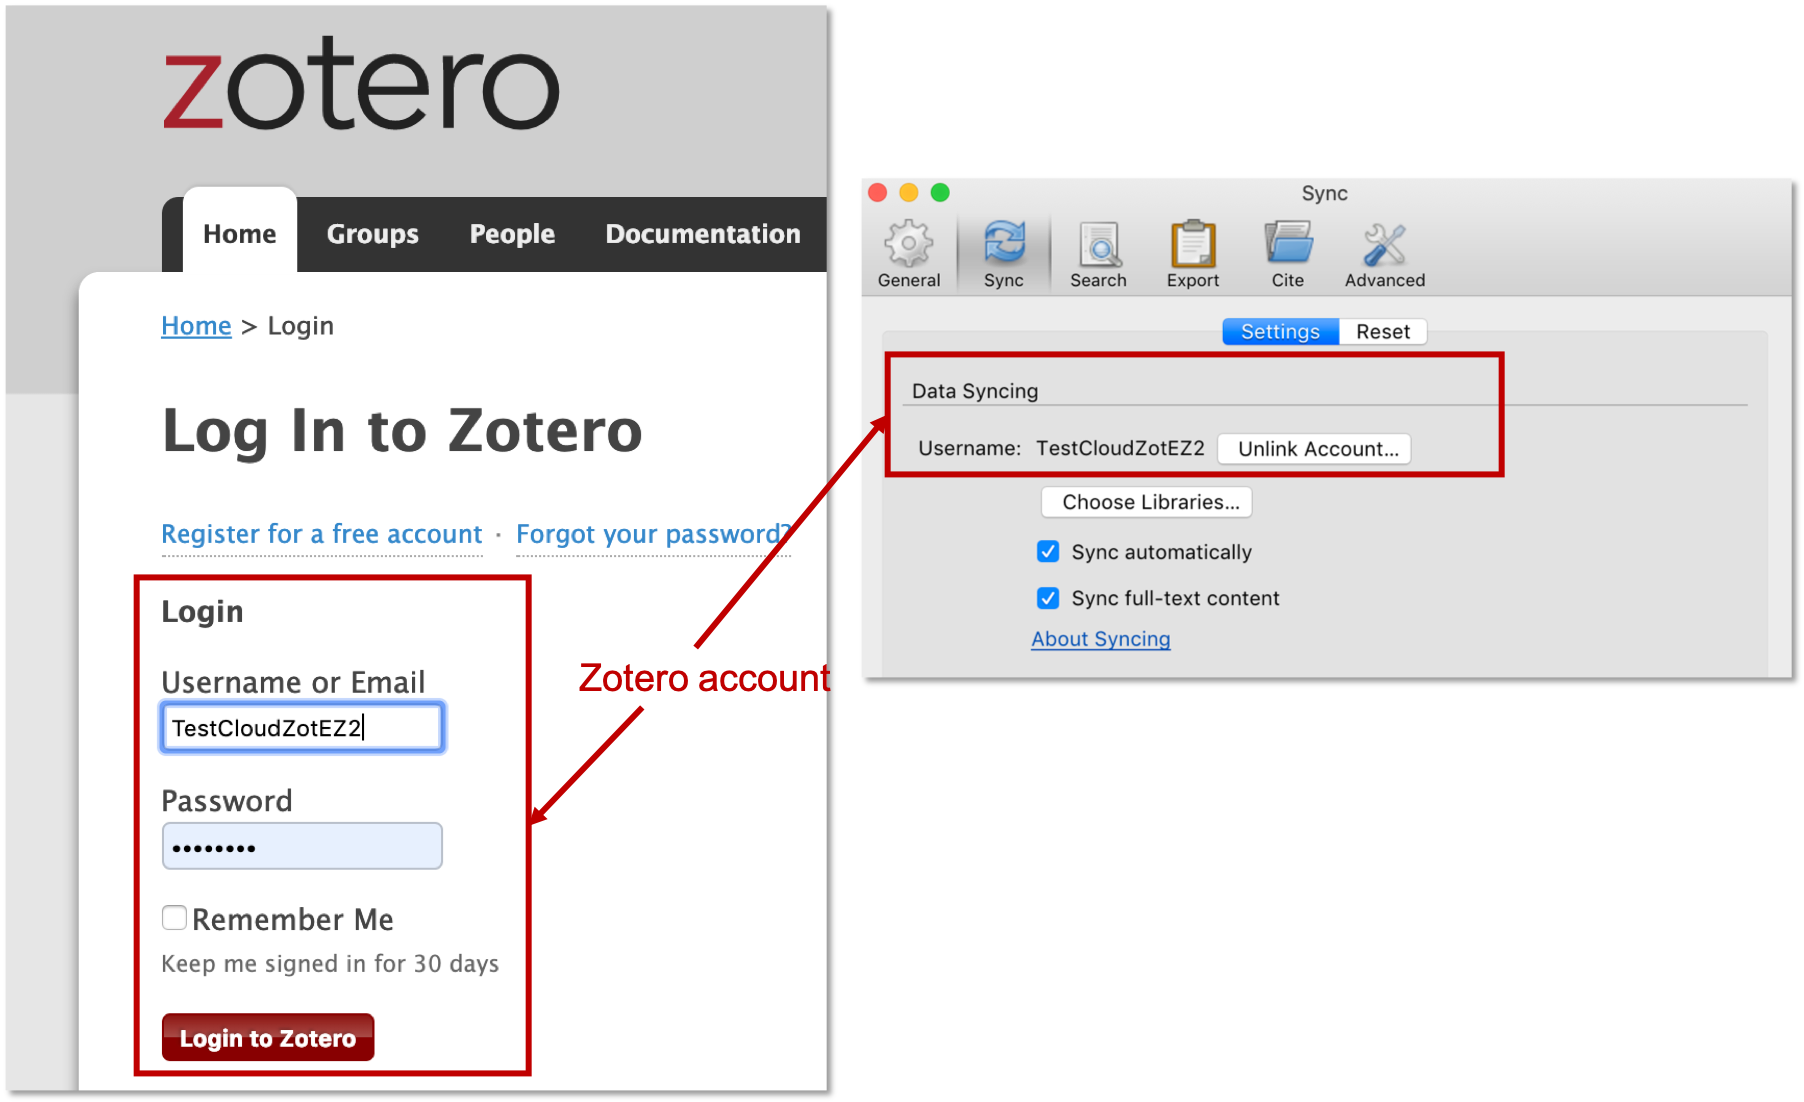
Fig. 1 Standard way of signing into Zotero, using a web browser (left) or the desktop app (right)
In ZotEZ2, after hitting the Start Setup button, just sign in by clicking on "Next" and follow the instructions (Fig. 2).
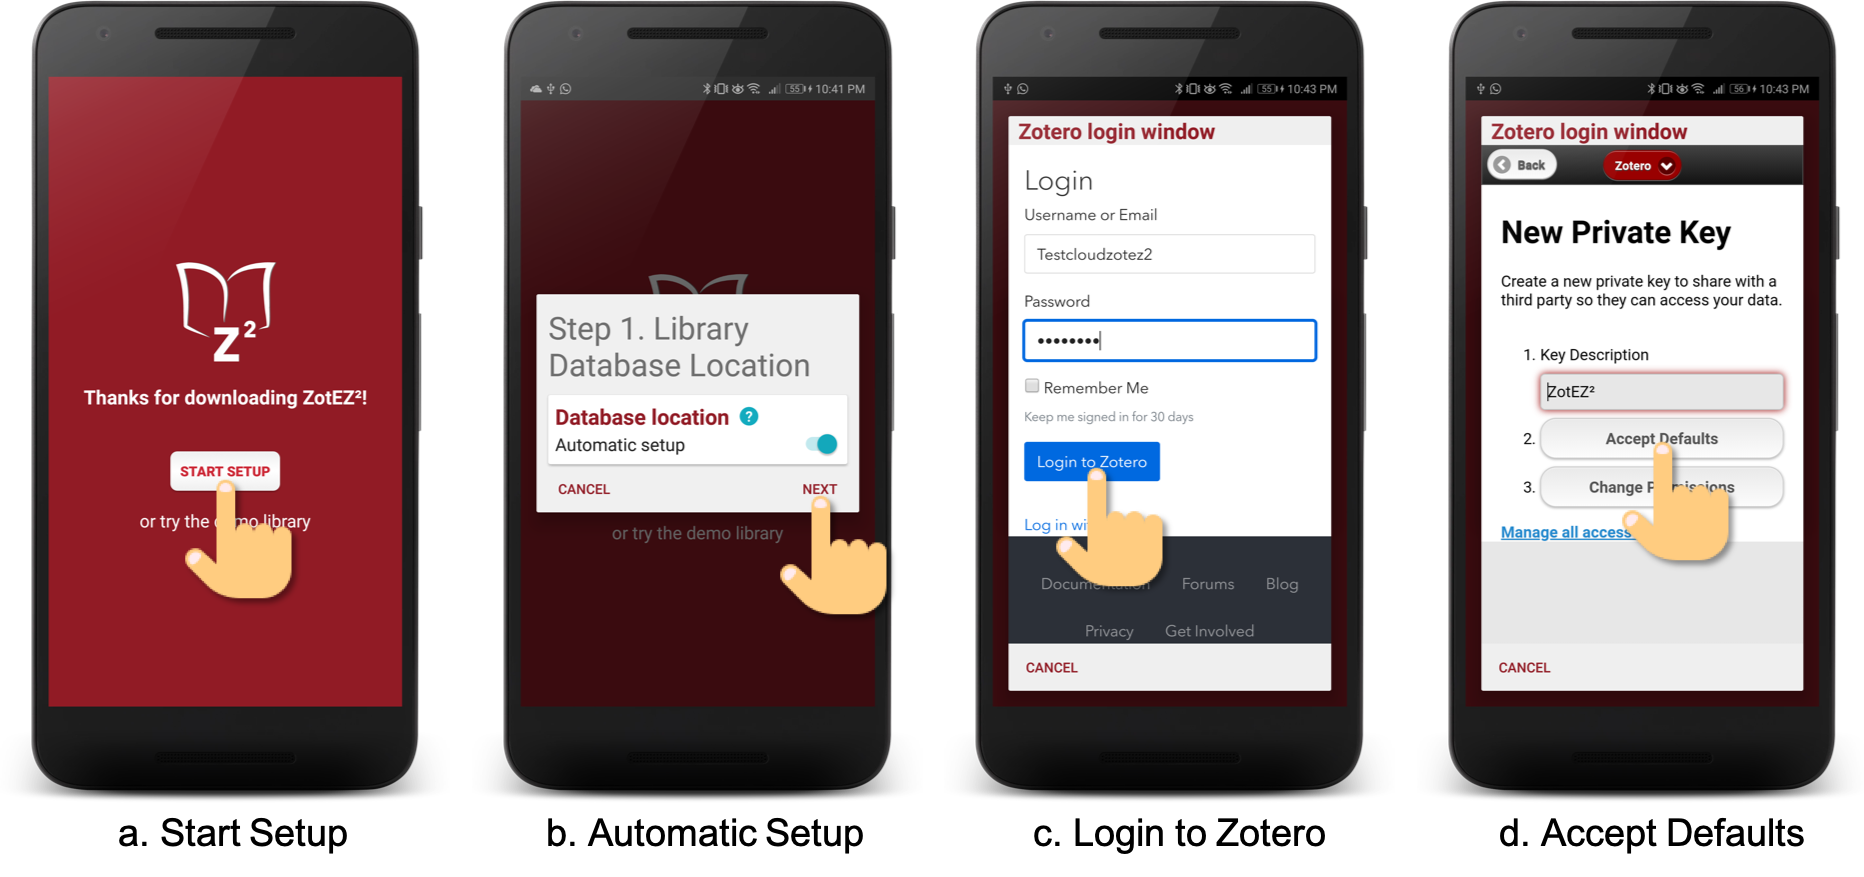
Fig. 2 Signing in Zotero from ZotEZ2
Then, if your PDF files are stored on Zotero servers, you can skip step 2 as shown in Fig 3-Option 1. Otherwise, you can continue with manual storage folder configuration by switching off Automatic Setup like in Fig 3-Option 2.
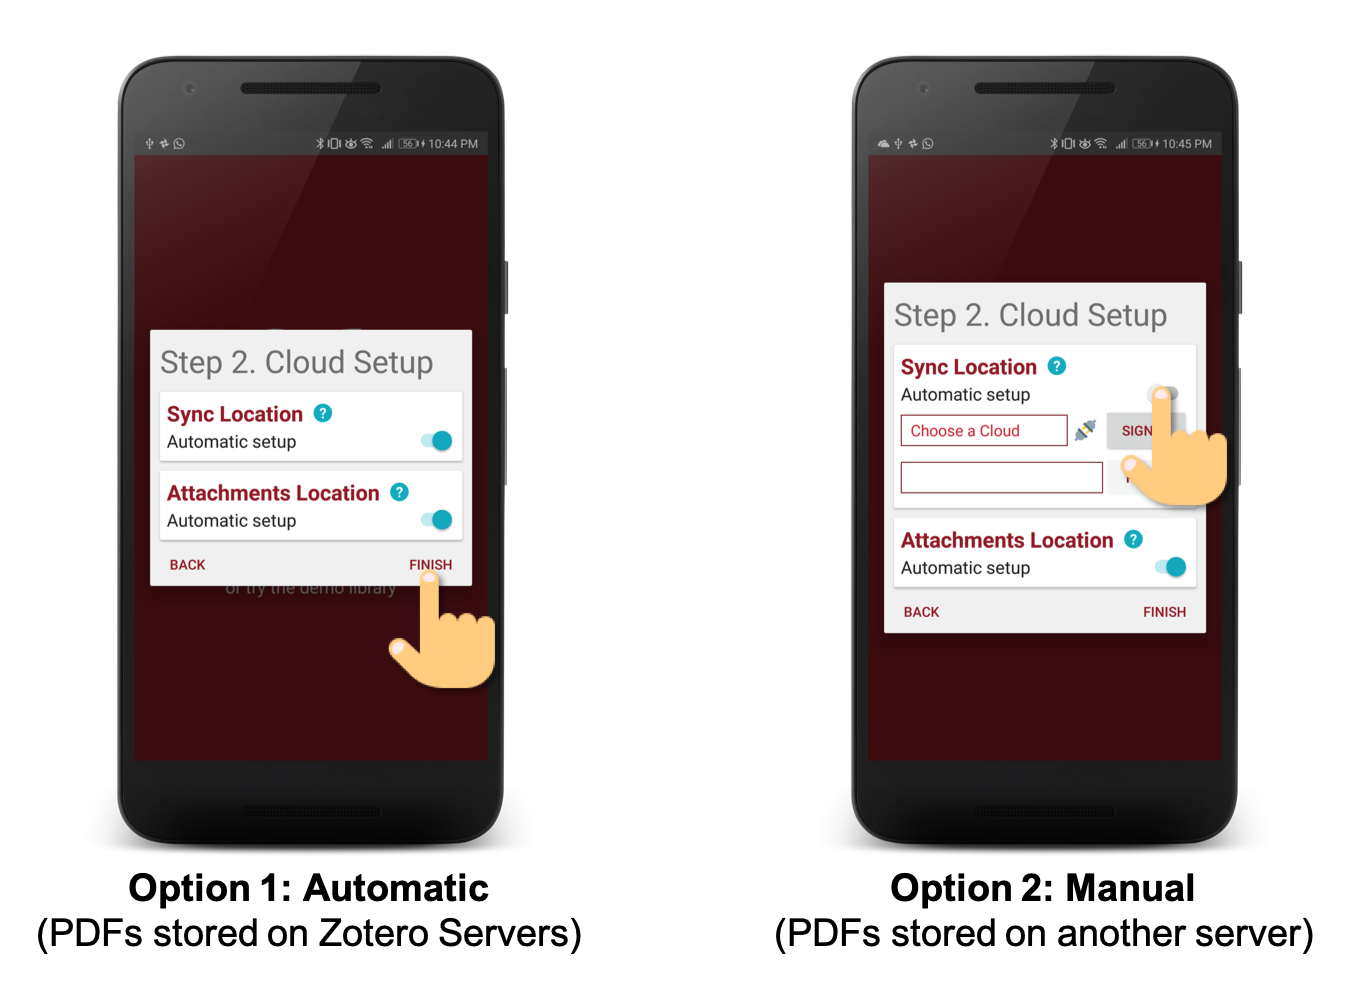
Fig. 3 Automatic vs. Manual setup for storage of PDF files
Step 2. Main Storage Location
The main storage location is the folder where all the PDFs are stored by default.
More precisely, this is where the files highlighted in the image below (Fig. 4) are located:

Fig. 4 Representation of storage PDF files in Zotero desktop app
By default, if you use only Zotero servers, i.e. their own cloud storage, you don't need to configure anything in this step. Just click Finish (Fig. 3).
In today's tutorial, we'll cover one of the three other options to be able to access your PDF files: the WebDAV
connection.
This option is for you if you are accessing your library database directly from Zotero servers, and you've setup the WebDav synchronization (Fig. 5).
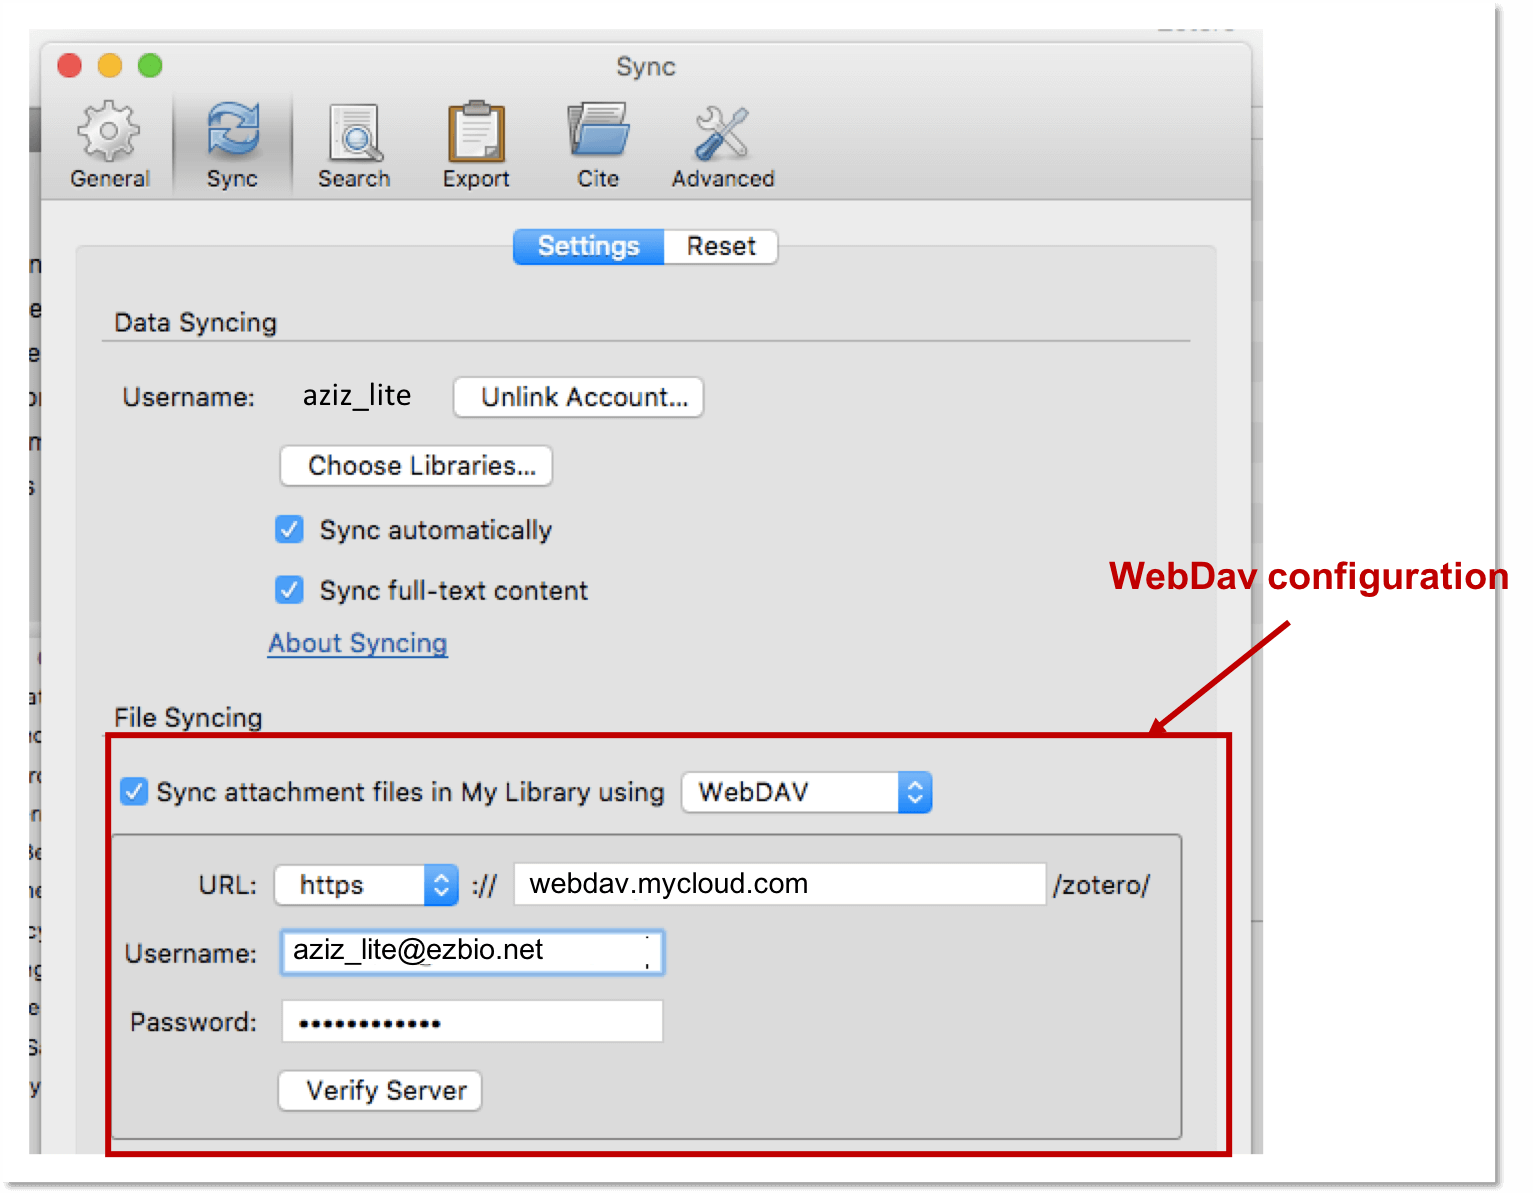
Fig. 5 Setting up WebDAV in Zotero desktop app
In ZotEZ2, you need to connect to the same WebDav as the one you configured, like in the following screenshot (Fig. 6).
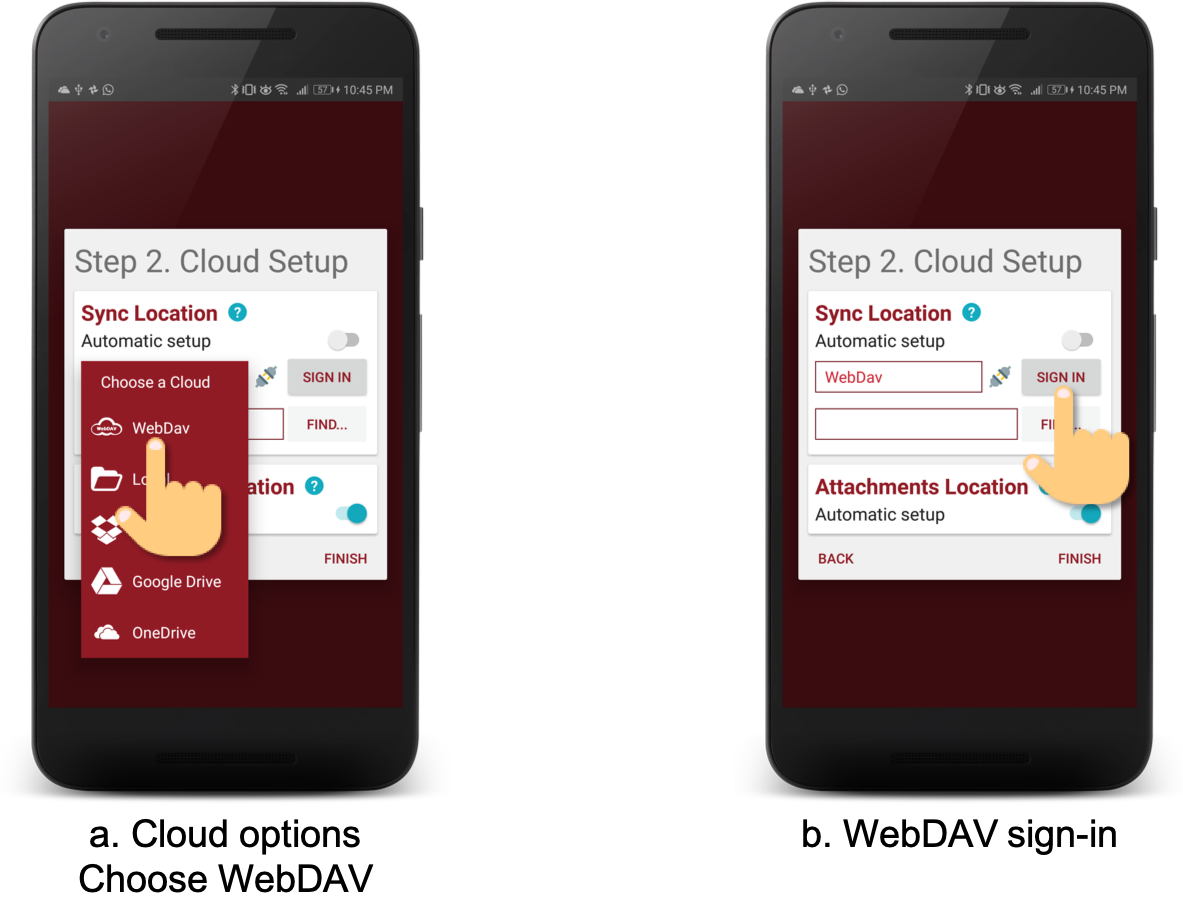
Fig. 6 Setting up WebDAV in ZotEZ2
Note that there is a slight difference between the way you configure your Zotero desktop app and the way you configure ZotEZ2. In Zotero, you need to provide directly the full path to your /zotero/ folder directly in the WebDAV address. Yet, for homogeneity reasons with other "Clouds", ZotEZ2 requires in the first connection step that you provide the simplest web address to your WebDAV, i.e. the address to your root folder (Fig. 7).
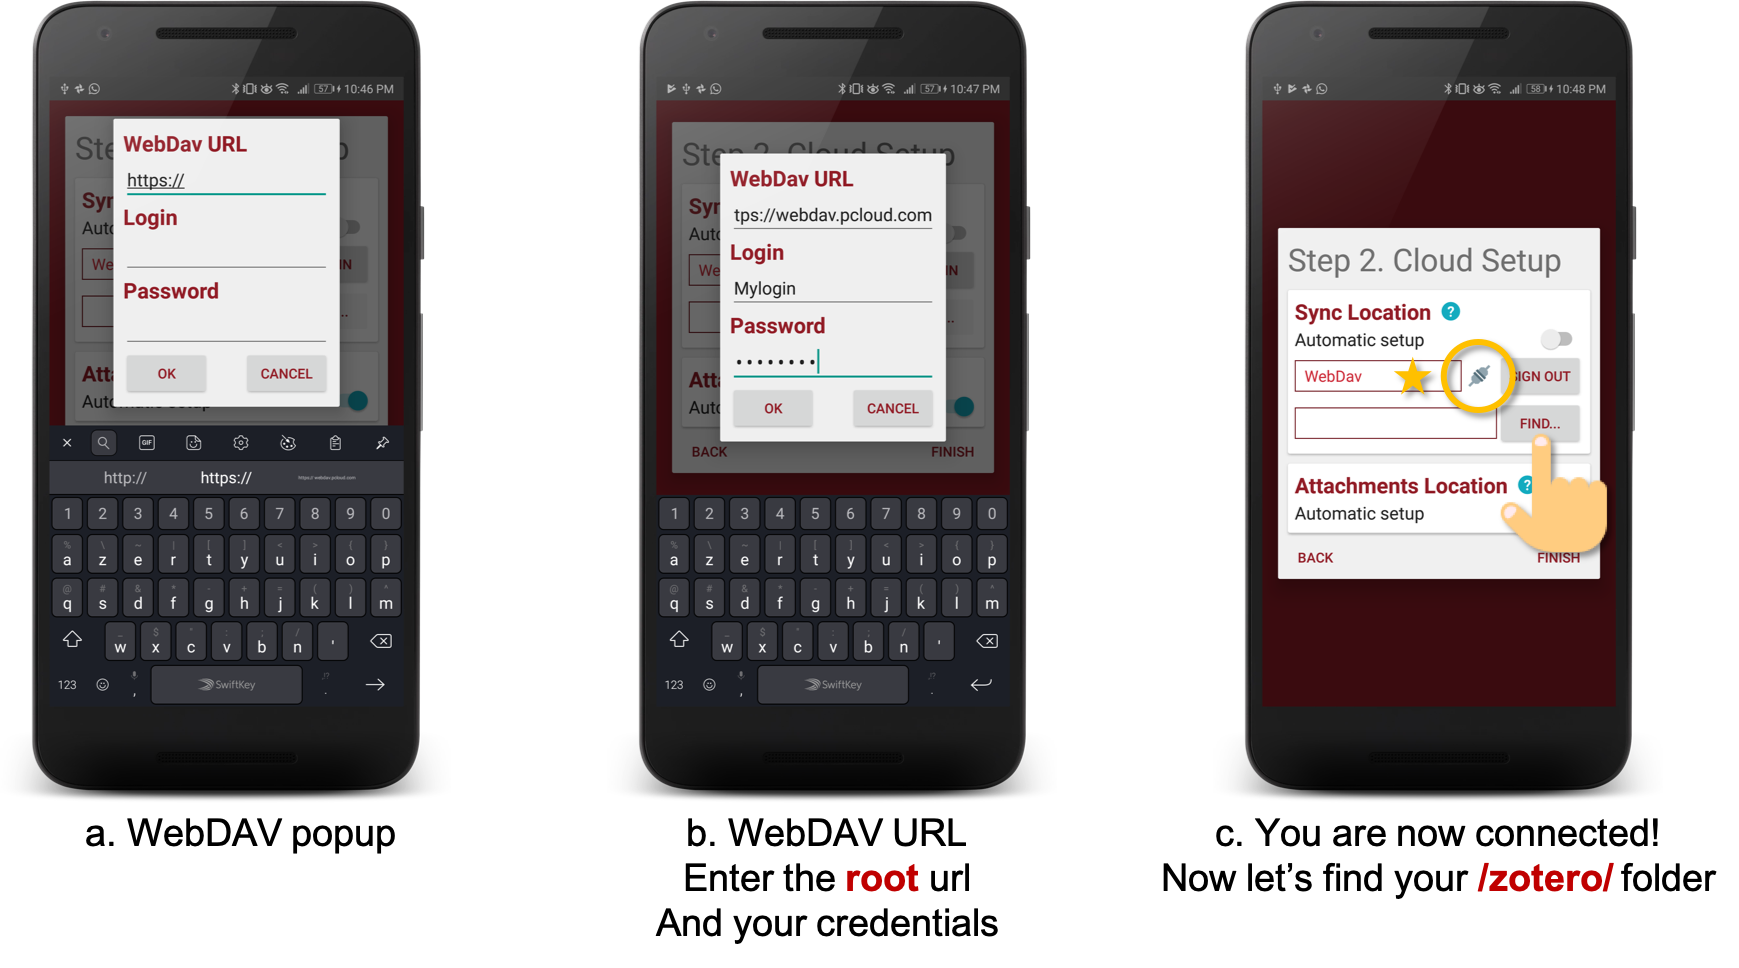
Fig. 7 WebDAV server verification in ZotEZ2
Then, when the connection is verified, you will be asked to choose the exact location of the /zotero/ folder (Fig. 8). This has multiple advantages in a smartphone-based interface: you don't have to type too many characters in the webdav connection screen, you don't have to be behind your computer to remember the path to /zotero/ and type it on your phone, ...
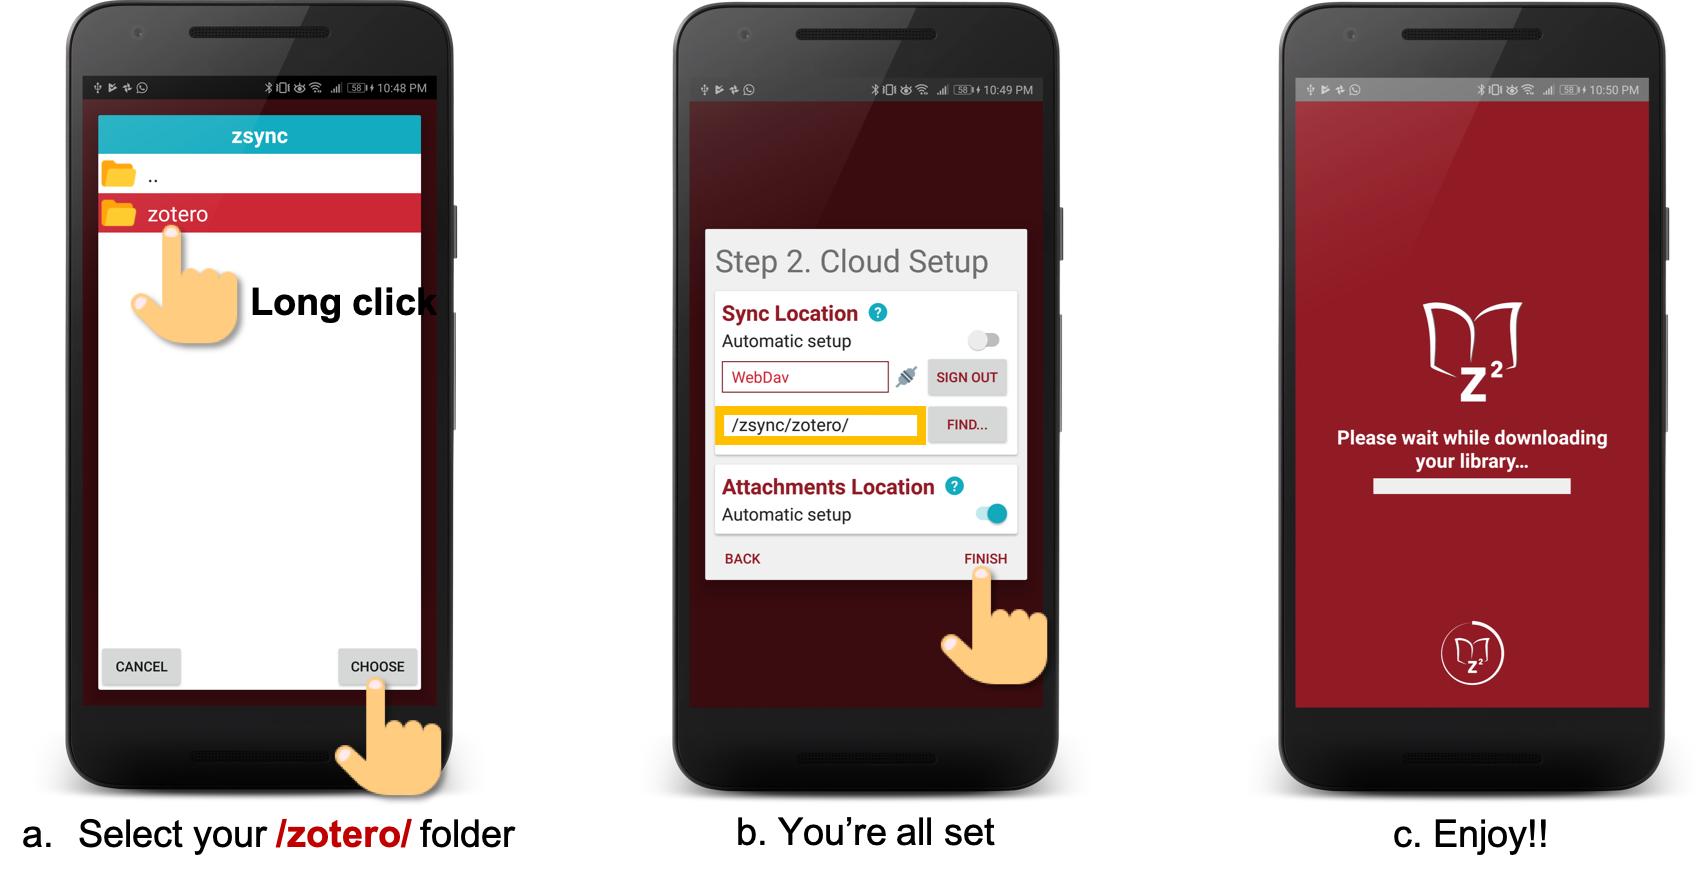
Fig 8. ZotEZ2 Folder chooser for the /zotero/
And ... that's it, your WebDAV can be accessed from ZotEZ2!! Enjoy the read!
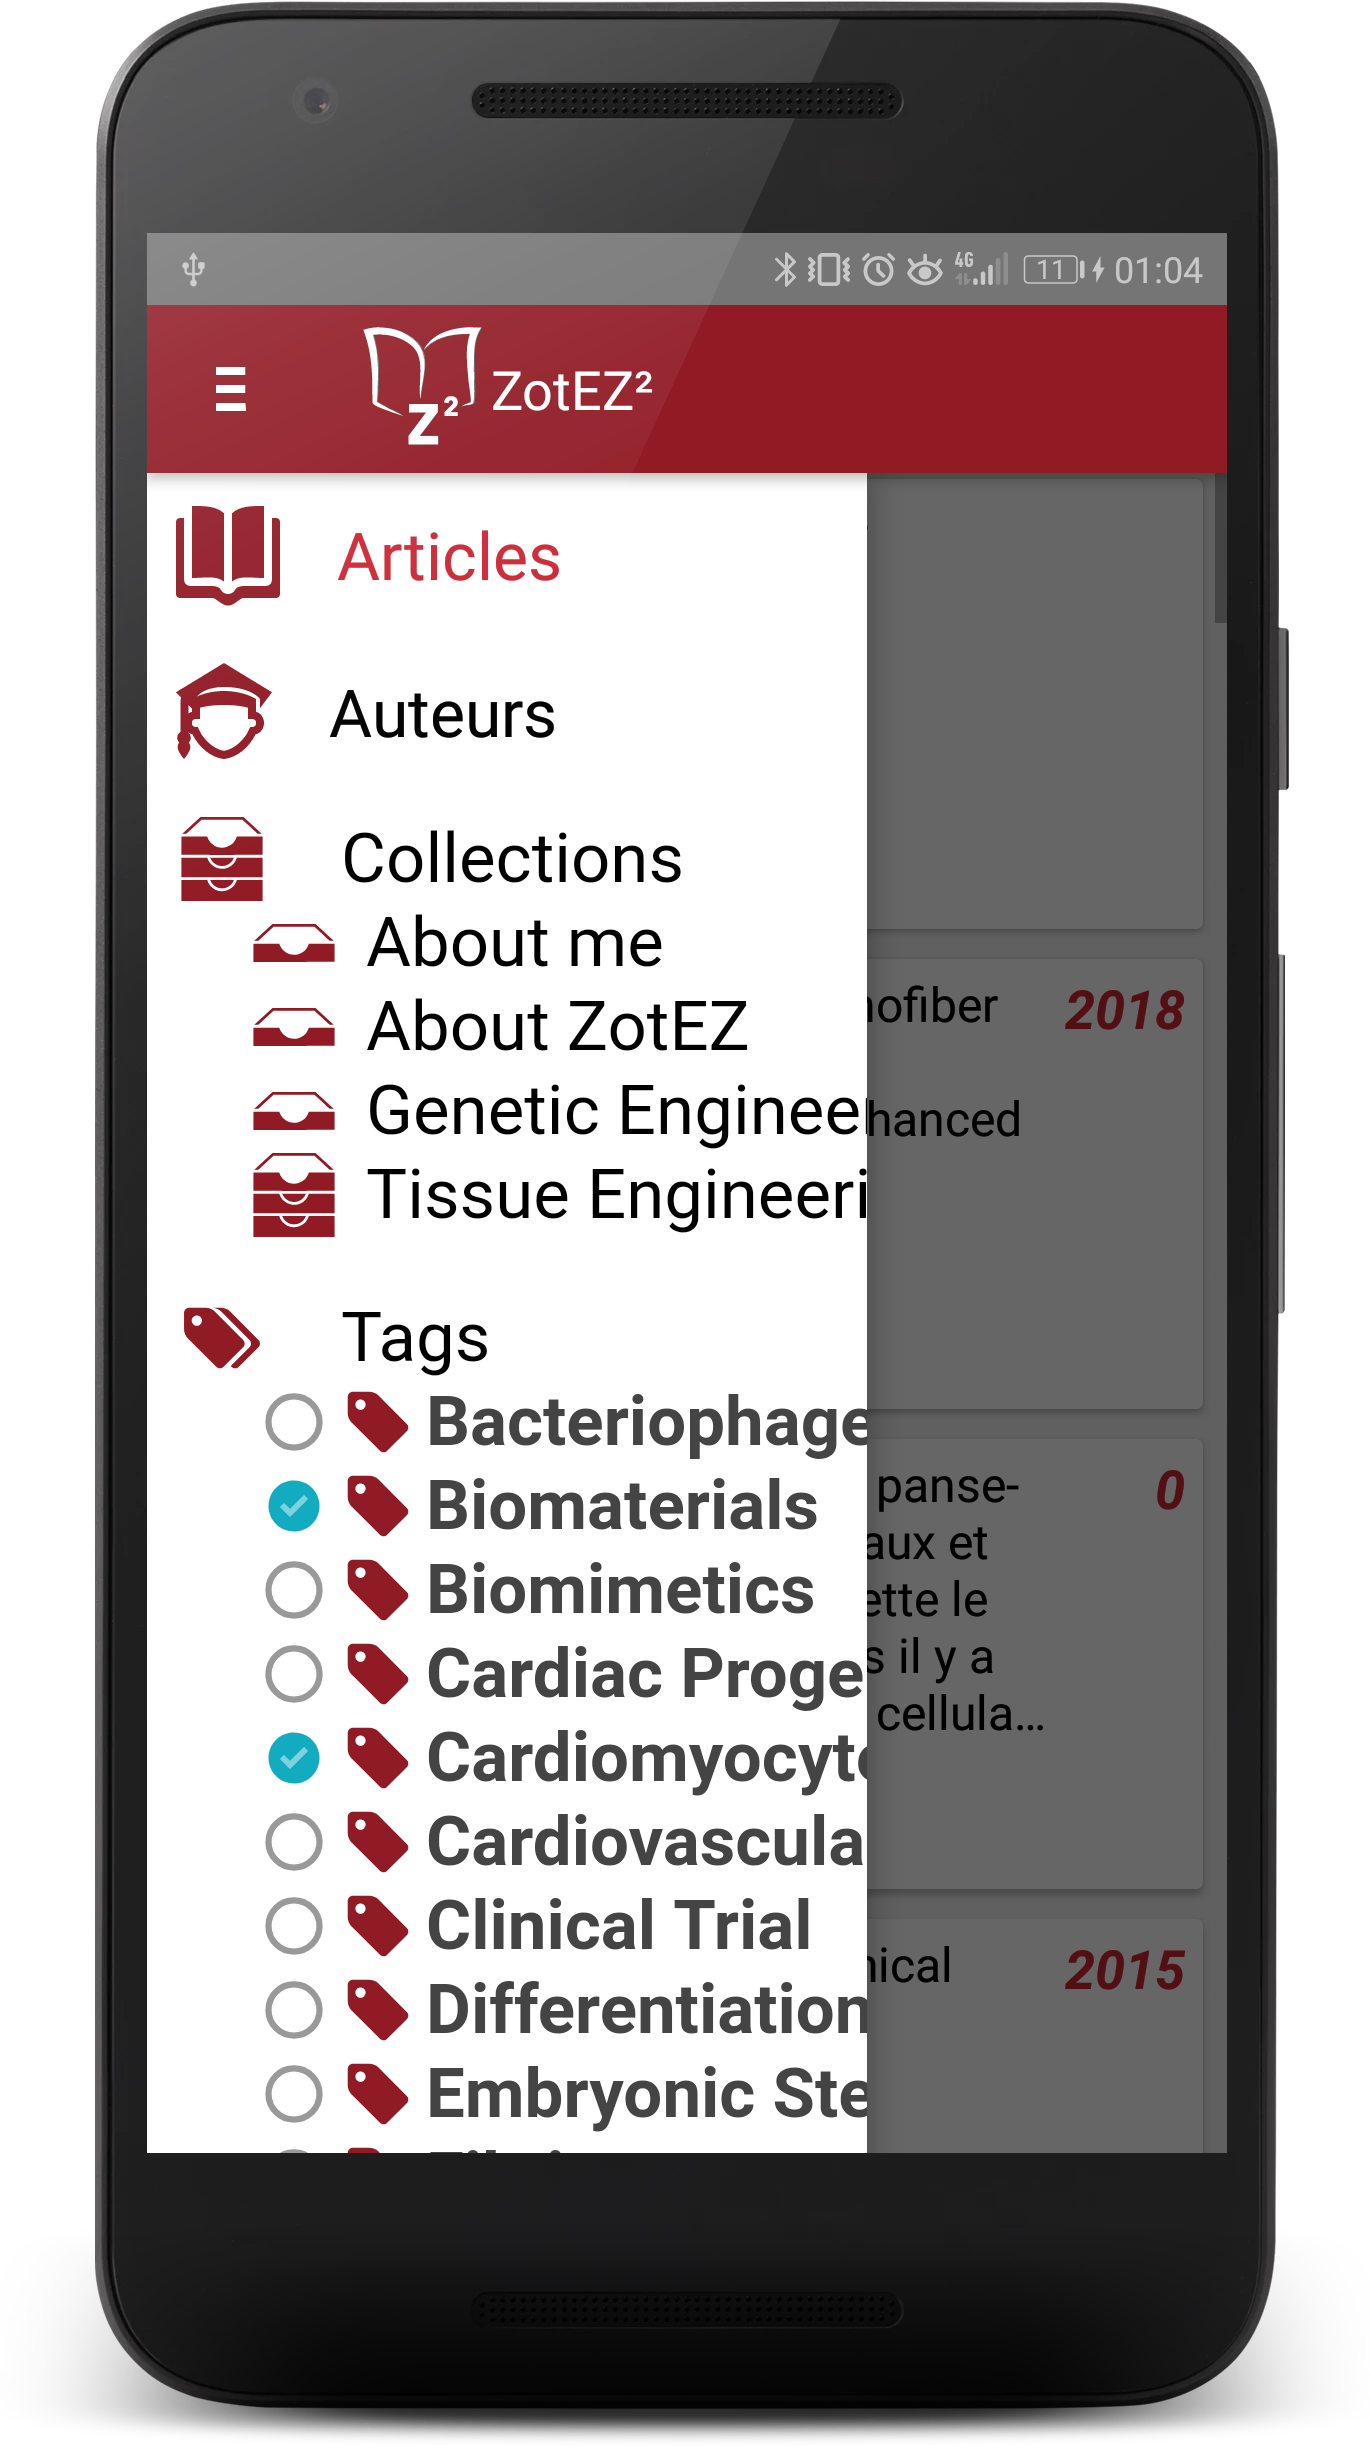
In the next episode, we'll show you how to set up ZotEZ2 to display your Collections and Tags directly from the Navigation drawer... Stay Tuned!
 ZotEZ2
